> ## Documentation Index
> Fetch the complete documentation index at: https://docs.jiekou.ai/llms.txt
> Use this file to discover all available pages before exploring further.
# OpenManus
OpenManus-RL 是由 Ulab-UIUC 和 MetaGPT 联合主导的开源项目,是Manus的复刻开源版本-OpenManus的扩展版本,受 Deepseek-R1、QwQ-32B 等基于 RL 调优推理 LLM 的成功启发,旨在探索基于 RL 的 LLM 智能体调优新范式,会定期公开在 GAIA、AgentBench 等智能体基准上的测试进展和调优模型。
为了帮助大家更好地使用 OpenManus,我们准备了一份详细教程,从环境配置到接入『接口AI』,手把手教你玩转 OpenManus!
## 1.配置前置条件
### (1)获取 API 密钥注册
注册并登录 JieKou.AI,注册时填写邀请码【YGHNZ0】可得 \$2 注册奖励。

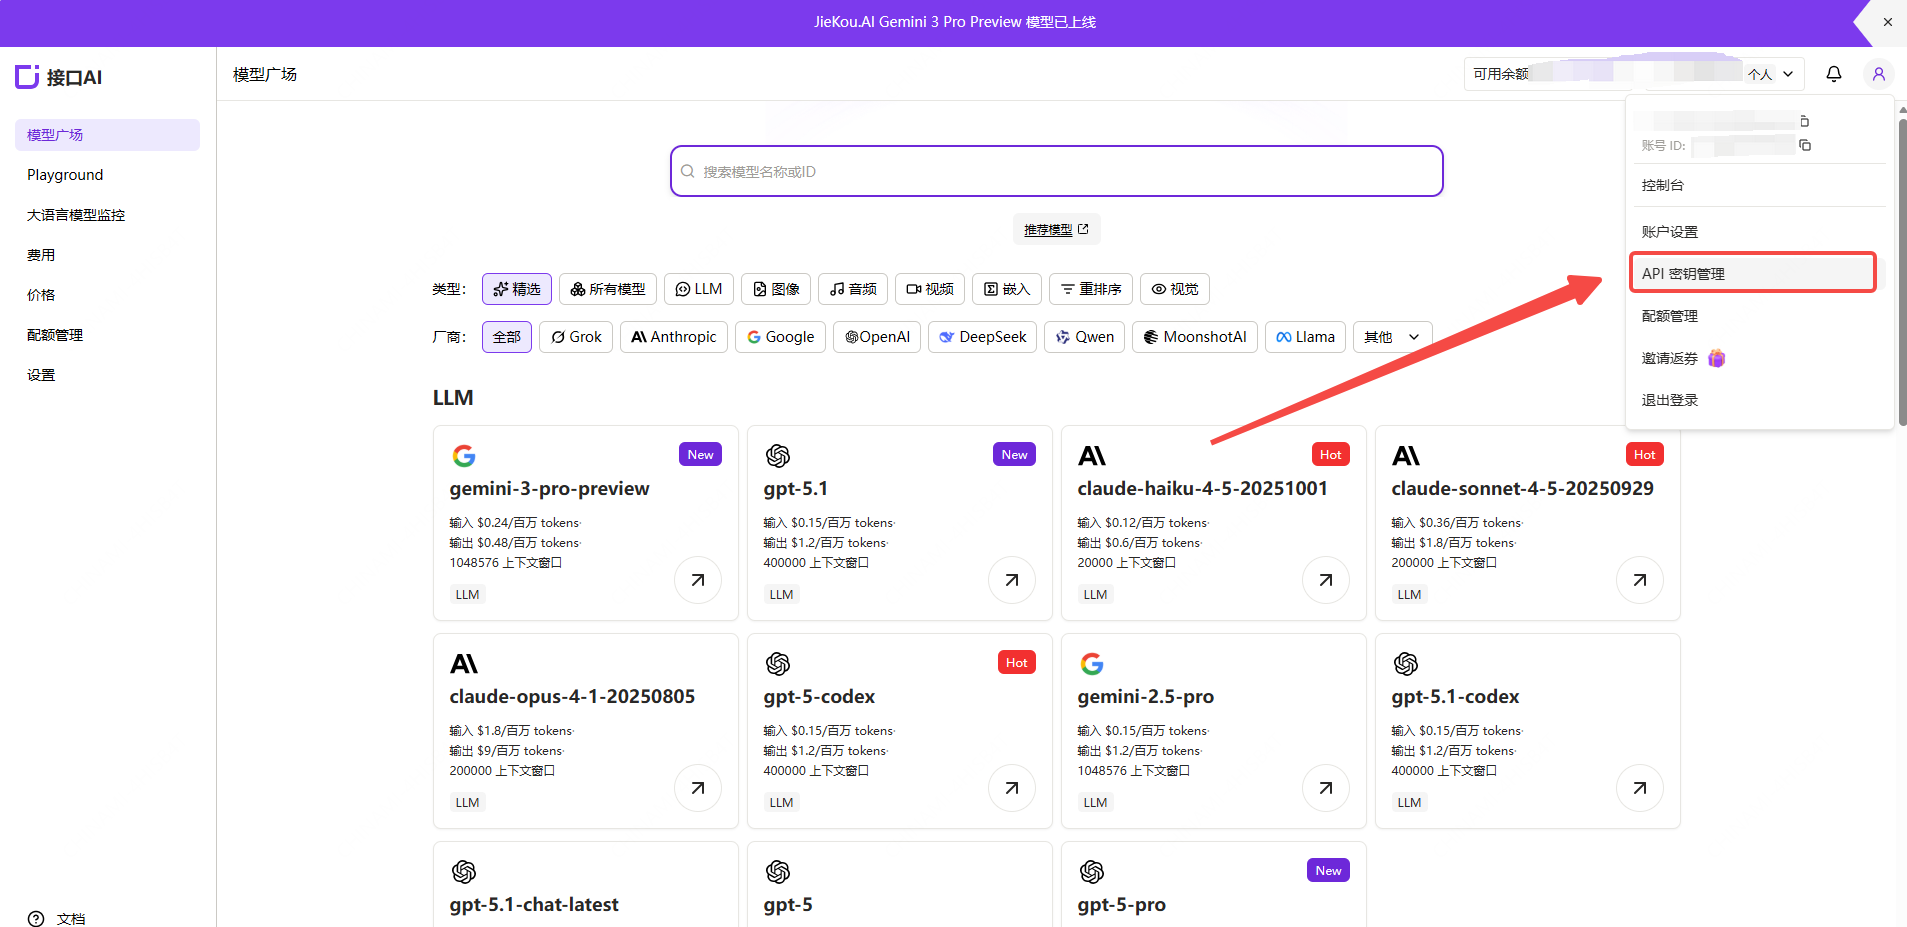 打开【API key】管理页面,点击添加按钮,输入自定义密钥名称,生成API密钥。
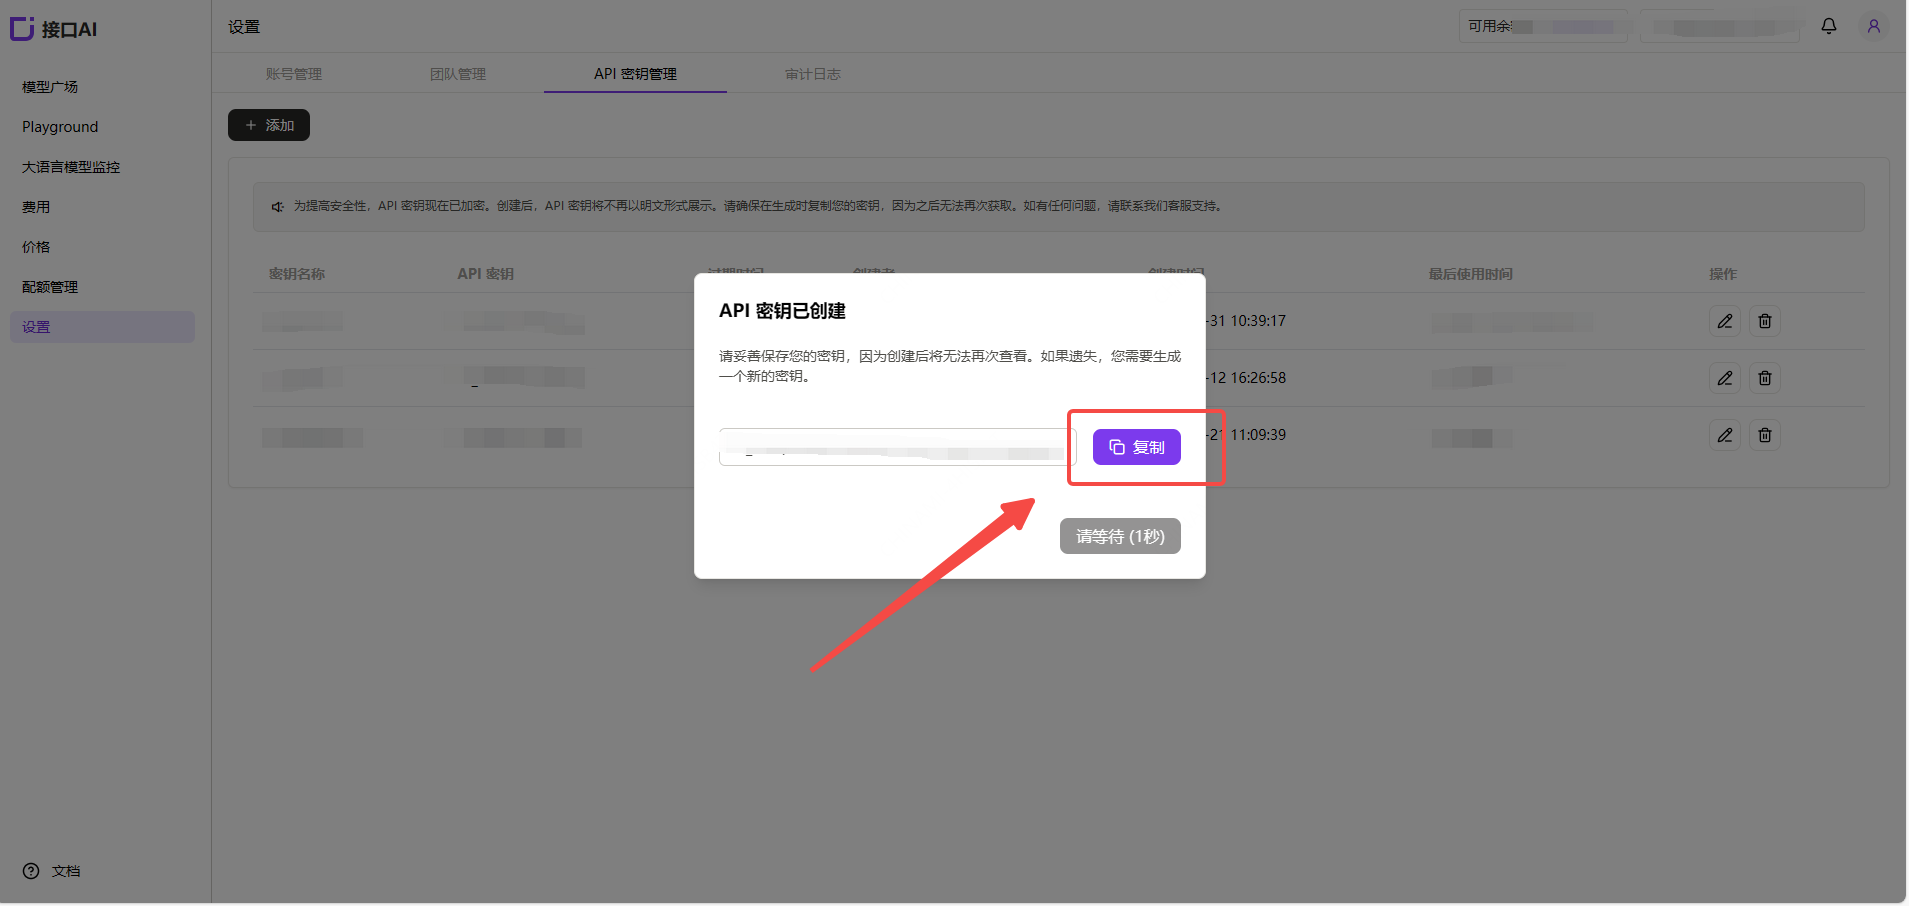
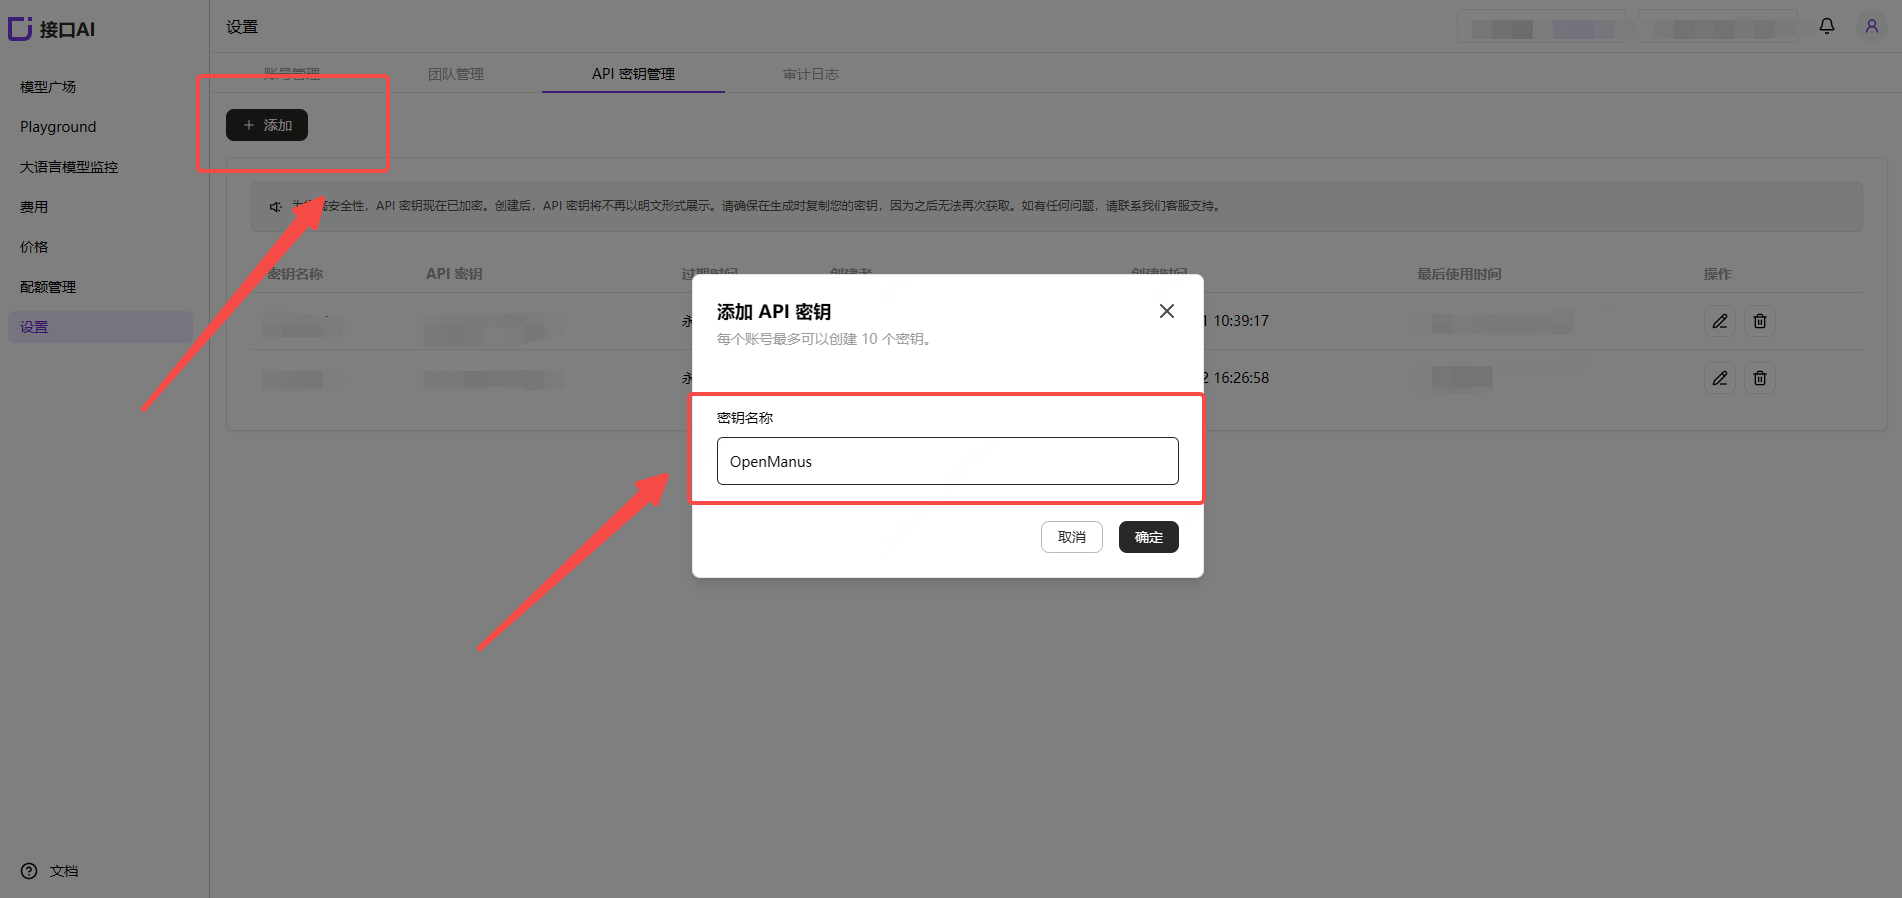 ### (2)生成并保存 API 密钥
!注意:密钥在服务端是加密存储,创建后无法再次查看,请妥善保存好密钥;若遗失需要在控制台上删除并创建一个新的密钥。
### (2)生成并保存 API 密钥
!注意:密钥在服务端是加密存储,创建后无法再次查看,请妥善保存好密钥;若遗失需要在控制台上删除并创建一个新的密钥。
 ### (3)获取需要使用的模型 ID
在 JieKou.AI 的模型广场找到想用的模型,复制模型id和基础URL。
* Gemini-3-pro-preview
* Gemini-2.5-pro
* Claude-sonnet-4-5
* Gpt-5.1
* Gpt-4o
其他模型ID、最大上下文及价格可参考:[模型广场](https://jiekou.vip/models-console/library?auth_res=success\&is_reg=false)
## 2. 安装 OpenManus
具体安装指南参考:[安装指南](https://github.com/FoundationAgents/OpenManus/blob/main/README_zh.md#%E5%AE%89%E8%A3%85%E6%8C%87%E5%8D%97)。下列安装教程以windows系统,以安装指南中的"方式二"为例。
1.安装 uv(一个快速的 Python 包管理器):
```
curl -LsSf https://astral.sh/uv/install.sh | sh
```
2.克隆仓库:
```
git clone https://github.com/FoundationAgents/OpenManus.git
cd OpenManus
```
3.创建并激活虚拟环境:
```
uv venv --python 3.12
source .venv/bin/activate # Unix/macOS 系统
Windows 系统使用:
.venv\Scripts\activate
```
4.安装依赖:
```
uv pip install -r requirements.txt
```
## 3.配置 OpenManus
OpenManus 需要配置使用的 LLM API,请按以下步骤设置:
1.在 `config` 目录创建 `config.toml` 文件(可从示例复制):
```
cp config/config.example.toml config/config.toml
```
2.编辑 `config/config.toml` ,更改【model】,【base\_url】,【api\_key】,添加 API 密钥和自定义设置:
```
#全局 LLM 配置
[llm]
model = "gpt-4o"#如需更改模型,复制接口AI官网模型名称在此
base_url = "https://api.highwayapi.ai/openai"
api_key = "在此处粘贴接口AI官网的API Key" # 此处更改
max_tokens = 4096
temperature = 0.0
# 可选特定 LLM 模型配置
[llm.vision]
model = "gpt-4o"#如需更改模型,复制接口AI官网模型名称在此
base_url = "https://api.highwayapi.ai/openai"
api_key ="在此处粘贴接口AI官网的API Key" # 此处更改
```
## 4.快速启动 OpenManus
一行命令运行 OpenManus:
```
python main.py
```
然后在 `enter your prompt` 后输入你的创意!
### (3)获取需要使用的模型 ID
在 JieKou.AI 的模型广场找到想用的模型,复制模型id和基础URL。
* Gemini-3-pro-preview
* Gemini-2.5-pro
* Claude-sonnet-4-5
* Gpt-5.1
* Gpt-4o
其他模型ID、最大上下文及价格可参考:[模型广场](https://jiekou.vip/models-console/library?auth_res=success\&is_reg=false)
## 2. 安装 OpenManus
具体安装指南参考:[安装指南](https://github.com/FoundationAgents/OpenManus/blob/main/README_zh.md#%E5%AE%89%E8%A3%85%E6%8C%87%E5%8D%97)。下列安装教程以windows系统,以安装指南中的"方式二"为例。
1.安装 uv(一个快速的 Python 包管理器):
```
curl -LsSf https://astral.sh/uv/install.sh | sh
```
2.克隆仓库:
```
git clone https://github.com/FoundationAgents/OpenManus.git
cd OpenManus
```
3.创建并激活虚拟环境:
```
uv venv --python 3.12
source .venv/bin/activate # Unix/macOS 系统
Windows 系统使用:
.venv\Scripts\activate
```
4.安装依赖:
```
uv pip install -r requirements.txt
```
## 3.配置 OpenManus
OpenManus 需要配置使用的 LLM API,请按以下步骤设置:
1.在 `config` 目录创建 `config.toml` 文件(可从示例复制):
```
cp config/config.example.toml config/config.toml
```
2.编辑 `config/config.toml` ,更改【model】,【base\_url】,【api\_key】,添加 API 密钥和自定义设置:
```
#全局 LLM 配置
[llm]
model = "gpt-4o"#如需更改模型,复制接口AI官网模型名称在此
base_url = "https://api.highwayapi.ai/openai"
api_key = "在此处粘贴接口AI官网的API Key" # 此处更改
max_tokens = 4096
temperature = 0.0
# 可选特定 LLM 模型配置
[llm.vision]
model = "gpt-4o"#如需更改模型,复制接口AI官网模型名称在此
base_url = "https://api.highwayapi.ai/openai"
api_key ="在此处粘贴接口AI官网的API Key" # 此处更改
```
## 4.快速启动 OpenManus
一行命令运行 OpenManus:
```
python main.py
```
然后在 `enter your prompt` 后输入你的创意!